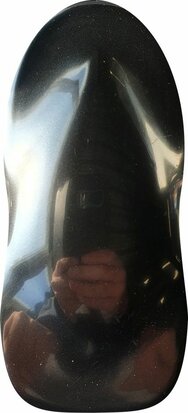
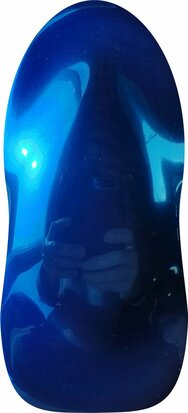
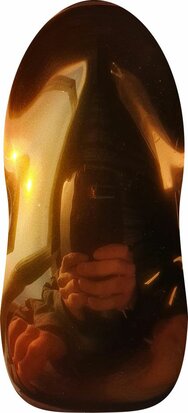
Image 1 is the chrome paint image 2 with a blue candy over it and image 3 with a candy mix.
BACKGROUND:
Best is an highgloss black.
CHROME PAINT:
Shake well before use. Spray very thin passes with a spraygun with small nozzle size (0.5~1.0mm) and a low pressure (2 bars), reducing the paint flow at the maximum (press slightly on the trigger) and by letting the air escape, until you reach maximum chrome effect.
Allow a few seconds between each pass to let dry, and observe the formation of the chrome during evaporation. Make the coats not too thick. Between each dry pass, the surface can be polished with a piece of cotton to remove any dust or smudge.
Too much chrome paint will turn in an silver results.
- Apply a Black Basecoat.
- Allow the basecoat to fully dry 45 minutes and now you are ready to apply the topcoat 2k Show Clear. (If your surface already has a glass like finish, move to Step 4.)
- Apply 2 coats of 2K Show Clear and allow to dry. NOTE: We Recommend you to wait 36 Hours for all of the tail solvents to evaporate before you can proceed to Step 4. You can now sand and buff if necessary to remove any surface imperfections, you will need to be sure to remove all compounds and wax residues with rubbing alcohol to insure a streak-free surface prior to applying the Chrome. Do not use too hard clear varnish, then the chrome paint will adhere poorly.
- Begin applying 2-4 coats of Chrome using a dusting effect, a very small volume of material with a substantial amount of air. If you are using an HVLP gun you should be around 20 psi otherwise use whatever the recommended air pressure is for your gun, remembering to keep the material volume very low. Spray with a gun with a fine atomization max 1.0 nozzle.
- Between Coats use a very soft lint-free cloth and carefully remove all of the excess "dust" from the surface every time, when you complete this step you will notice a improvement in the appearance. When you have finished applying our Chrome coating use a very soft clean lint-free cloth, soak the cloth with clean warm water and carefully wash the object to remove all of the excess "dust" from the surface. Once you complete this step you will notice a improvement in the final appearance.
- Varnishing requires a special technique: Start with 4 dry coats (micro coats), 1 to 2 minutes apart. Only then varnish normally.
The topcoat step is the critical step as any liquid product applied over the chromium layer can change the position of the microchrome particles and destroy the moirror effect. one can keep 80% of the original mirror effect or lose everything. That is why it is important to follow the instructions below.
About the chrome paint: the drier the better: bake (up to 150°C) or let it dry for days.
- As an example, we first sprayed Createx UVLS 4050 water-based varnish over the chrome paint. Let this dry completely and then sprayed the 2k. In this way we had the least loss of the mirror effect.
These products are solvent based, we recommend using a spray mask in a well ventilated area.


